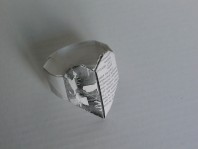

Heart Ring
Heart Ring
Welcome page
Back to the list

|

Heart Ring |
|
Folding sheets Heart Ring Welcome page Back to the list |
Aveuglami project - folding sheet
Heart Ring
| Author | Kumasaka Hiroshi |
| Category | hearts |
| Difficulty | *** |
| Format | square, two-tone |
| Base | box-pleating |
| Text | This folding can be used as both a napkin ring and a ring. It all depends on the size of the starting sheet.
1. Prepare a horizontal 8-sided box-pleating. You should not mark the folds too much as they could be reversed during folding. 2. Place the sheet in a horizontal position, with the color of the heart underneath. 3. Valley fold the top edge of the square from top to bottom using the first accordion fold from the top. 4. Create a valley fold by bringing the right edge to the left edge from right to left. Mark the fold. We have a vertical rectangular shape composed of two flaps linked by a vertical hinge fold located on the right. 5. Create a valley fold by bringing the upper edge of the front flap at 45¡ from left to right on the hinge fold. 6. Flip the fold from right to left. 7. Create a valley fold by bringing the upper edge of the front flap at 45¡ from right to left on the hinge fold. 8. Open the folding by bringing the rear flap forward. 9. Flip the fold from right to left. We have a shape with 5 sides (pentagon). The bottom is a rectangle, which is topped by a point facing upwards. 10. Fold the upper point into a valley using the second horizontal fold starting from the point. 11. Flip the fold from right to left. We now have a shape with 6 sides (hexagon) whose bottom forms a rectangle on which rests a blunt point whose top is a horizontal edge. This tip has two left and right flaps with a complex structure. Each flap has a vertical free edge located on the right for the left flap, on the left for the right flap. 12. Starting from the upper right apex of the upper left flap, create a valley fold by bringing the right vertical edge to the upper edge of the tip at 45¡ from right to left. Mark the fold well. Unfold. 13. The left flap has on its right a small vertical rectangular flap. Using the 45¡ fold made in step 12, raise the lower right top of the flap from right to left by opening the small rectangular flap. You can slide a finger under this flap to peel it off. Continue to push upwards until the initial flap is flat. An additional valley fold forms at the top right of the flap in place. We have just made a crushed fold. The initial flap is transformed into a quadrilateral with a long vertical side on the left, followed at the top to the right by a short horizontal side, then a short side going down at 45¡ and finally a long sloping side towards the left joining the bottom of the vertical side. The two 45¡ sides form a point pointing to the right. 14. Starting from the upper left vertex of the upper right flap, create a valley fold by bringing the left vertical edge to the upper edge of the point at 45¡ from left to right. Mark the fold well. Unfold. 15. The right flap has on its left a small vertical rectangular flap. Using the 45¡ fold made in step 14, raise the lower left top of the flap from left to right by opening the small rectangular flap. You can slide a finger under this flap to peel it off. Continue to push upwards until the initial flap is flat. An additional valley fold forms at the top left of the flap in place. We have just made a crushed fold. The initial flap is transformed into a quadrilateral with a long vertical side on the right, followed at the top towards the left by a short horizontal side, then a short side going down at 45¡ and finally a long side also in slope joining the bottom of the vertical side. These two sides form a point pointing towards the left. 16. Create a valley fold by bringing the upper right vertex of the left flap to the vertex of the right tip at 45¡ from left to right. This brings the top edge of the left flap along the middle vertical crease of the shape. Mark the fold well. 16. Create a valley fold by bringing the upper left vertex of the right flap to the vertex of the left tip at 45¡ from right to left. This brings the top edge of the right flap along the middle vertical crease of the shape. Mark the fold well. The starting pentagonal shape is now topped by two small triangles. 17. Fold the bottom edge of the pentagonal shape into a valley from the bottom to the top using the first horizontal fold from the bottom. Mark the fold well. We obtain an extra thick strip. 18. Fold the bottom edge of the shape three times in a valley from the bottom to the top using the first horizontal fold from the bottom. Mark the fold carefully each time. We obtain a fairly thick strip which carries the heart at the back. 19. Bring the two ends of the strip together to form the ring. Slide the right end end inside the left end end. Push as far as possible to securely lock the assembly. This is a beautiful object which, depending on its size, can be used as a napkin ring or a ring. Take measurements carefully! |
| Contents | File |
| Heart Ring - PDF file | ML-Heart01Ang.pdf |