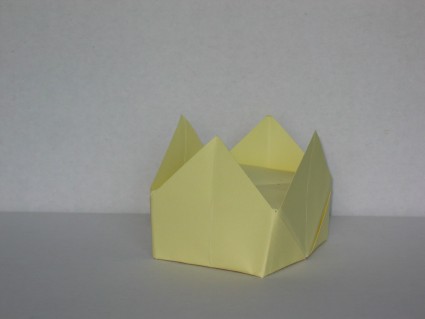

Crown
Crown
Welcome page
Back to the list

|

Crown |
|
Folding sheets Crown Welcome page Back to the list |
Aveuglami project - folding sheet
Crown
| Author | Traditional |
| Category | hat |
| Difficulty | ** |
| Format | square |
| Base | blintz |
| Text | A very simple, but very elegant crown. Pay attention to the dimensions!
1. Take a square sheet. Prepare a blintz base. Hold it in a horizontal position, with the free flaps upwards. 2. Create a valley fold by bringing the top edge over the bottom edge from top to bottom. We obtain a rectangular shape composed of two flaps linked by an upper hinge edge. Each flap has, on the inside, a triangular shape with a free point towards the hinge fold. 3. Create a valley fold by bringing the bottom edge of the front flap up and down over the top hinge edge, without folding the hidden tip attached to it. To do this, it is necessary to open the flap widely to help the tip come out without being folded. We now have a triangular front flap of simple thickness, linked to an accordion made up of two small rectangular flaps then a third flap which is the rear flap of step 2. 4. Flip the fold from right to left. 5. Create a valley fold by bringing the bottom edge of the front flap up and down over the top hinge edge, without folding the hidden tip attached to it. To do this, it is necessary to open the flap widely to help the tip come out without being folded. We now have a triangular front flap of simple thickness, linked to an accordion made up of four small rectangular flaps then a final simple triangular flap. The points of the two triangular flaps protrude on each side towards the bottom of the rectangular shape formed by the rectangular folds. 6. Open the fold so as to bring the two triangular flaps to the top. Simply insert your thumbs from below in the fold located most in the middle of all the folds (fold after the fold which connects the triangular flaps to the rest of the model). We now have a lower triangular shape facing downwards and an upper triangular shape facing upwards. 7. Lift the lower triangular flap vertically. 8. Create a valley fold by bringing the lower left vertex of the lower rectangular shape from left to right at 45° on the base of the raised flap. In practice, we fold a triangle upwards, a triangle made up of two vertical and horizontal edges and a 45° edge. 9. Create a valley fold by bringing the lower right vertex of the lower rectangular shape on the base of the raised flap from right to left at 45°. 10. Lower the triangular flap, which will block the two triangles that have just been put in place. 11 Turn the folding so as to bring the upper point to the lower position. 12. Lift the lower triangular flap vertically. 13. Create a valley fold by bringing the lower left vertex of the lower rectangular shape on the base of the raised flap from left to right at 45°. In practice, we fold a triangle upwards, a triangle made up of two vertical and horizontal edges and a 45° edge. 14. Create a valley fold by bringing the lower right vertex of the lower rectangular shape on the base of the raised flap from right to left at 45°. 15. Lower the triangular flap, which will block the two triangles that have just been put in place. We now have a square shape in the diamond position with a horizontal opening in the center. 16. Place your fingers in this opening, open gently by pushing on the bottom. A sort of box begins to take shape, which will ultimately be square in shape. 17. Slide your fingers little by little to the left and to the right, so as to help the square bottom to form. The two points that are horizontal on the top should tilt vertically. 18. Finish shaping by pinching both around the bottom of the crown (horizontal folds) and the vertical folds located on the edges at the bottom of each tip of the crown. |
| Contents | File |
| Crown - PDF file | ML-Hat04Ang.pdf |