
Pixie Hats
Pixie Hat
Welcome page
Back to the list

|

Pixie Hats |
|
Folding sheets Pixie Hat Welcome page Back to the list |
Aveuglami project - folding sheet
Pixie Hat
| Author | Jeannel Paul-Henri |
| Category | hat |
| Difficulty | ** |
| Format | square |
| Base | crumpling |
| Text | A very simple hat that even a child can make.
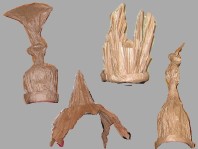
1. Hold the sheet of paper in a diamond position. 2. Fold the sheet in half on the vertical diagonal, using a valley fold from left to right. We obtain a triangular shape with a long hinge fold on the left. 3. Bring, by a valley fold from right to left passing through the upper vertex of the triangle, the right side of the triangle on the hinge edge. We obtain a front triangular flap smaller than the rear triangular flap. 4. Fold, using a valley fold from bottom to top, the lower point of the square, resting on the bottom of the upper triangular flap. 5. Unfold everything to return to the original square shape, still in the diamond position. Three folds should arrive at the upper vertex, only one at the lower vertex. 6. Fold the lower point upwards, using a valley fold using the horizontal fold found going up along the vertical fold towards the upper point. We obtain a quadrilateral with a small horizontal side at the bottom. Three folds arrive on the upper point. 7. Fold the top right side of the shape to the left, forming a valley fold from right to left using the rightmost fold of the three folds arriving at the top peak. 8. Fold the top left side of the shape to the right, forming a valley fold from left to right using the leftmost fold of the three folds arriving at the top peak. We obtain an isosceles triangular shape which opens into a cone. The short side will be the opening of the hat. 9. Roll the bottom edge of the shape on itself, so as to adjust the size of the opening to the size of your head. There is no reference for the height of the fold It is necessary to open the shape to complete this step. The first fold is the most difficult. You must hold the bottom of the shape well so that it does not fall apart. Three or four turns are usually enough. 10. Fold the triangular shape edge to edge several times along the vertical diagonal. 11. Strongly crease the resulting shape, changing the location of the folds several times. Return to the triangular shape. 12. Open the shape by sliding one arm inside. 13. Strongly crumple the conical tube again. 14. Repeat step 12 and step 13 as many times as you want. The more you crease, the more longitudinal folds there will be and the more malleable the tip of the cap will be. 15. Open the shape by sliding one arm inside. 16. Arrange the tip of the hat to your liking. This hat lends itself to countless variations and gives a festive look to any reception. |
| Contents | File |
| Pixie Hat - PDF file | ML-Hat02Ang.pdf |