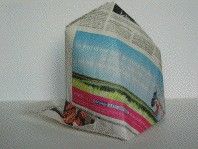

Cap
Cap
Welcome page
Back to the list

|

Cap |
|
Folding sheets Cap Welcome page Back to the list |
Aveuglami project - folding sheet
Cap
| Author | Traditional |
| Category | hat |
| Difficulty | ** |
| Format | square |
| Base | - |
| Text | Fun folding and easy to carry.
1. Take a square sheet of paper. If the sheet is two-tone, place the color underneath. A double sheet of newspaper cut into a square gives a good size. 2. Create a valley fold by bringing the bottom right vertex over the top left vertex from top to bottom. We obtain the triangular base, which we arrange by placing its long side horizontally and the opposite point upwards. This base is made up of two triangular flaps linked by a hinge fold which forms the lower edge. 3. Create a valley fold by bringing the upper right side of the upper triangle to the hinge edge. Do not mark the fold too much, you simply need to locate the point of intersection of this fold with the upper left edge of the triangle. 4. Create a valley fold by bringing the lower right point of the triangular shape from right to left to the point you have just identified. Mark the fold. 5. Unfold until you return to the starting triangular shape. 6. Bring the lower right point of the triangular shape to its previous position by a valley fold from right to left relying on the fold made in the penultimate step. The left side of the triangular shape is transformed into a broken line with a point pointing to the right. Spot it. 7. Create a valley fold by bringing the lower left point from left to right onto the right point that you have just identified. Mark the fold. We now have a 5-sided shape, with a point pointing upwards. This tip is formed of two superimposed triangular flaps. 8. Fold the front triangular flap from top to bottom along the horizontal thickness line formed by the previous fold of the left tip. This flap will become the visor of the cap. 9. Fold the rear triangular flap from top to bottom in a valley, leaning on the horizontal line formed by the fold of the previous step, so as to slide it inside the shape. 10. Turn the fold so that the opening is at the bottom instead of at the top. 11. Fold the front triangular flap down horizontally. There is no benchmark. A third is a good distance. 12. Gently open the fold, aiming to flatten it along a vertical fold passing through the middle of the original shape. Gently push on the top of the shape as it becomes three-dimensional, so that the top inverts and goes inside, using naturally formed mountain pleats. 13. Once the fold is completely flattened, grab the tip of the triangle that protrudes downwards and raise it into the visor position. The folding is complete, and we can use this magnificent cap. |
| Contents | File |
| Cap - PDF file | ML-Hat01Ang.pdf |