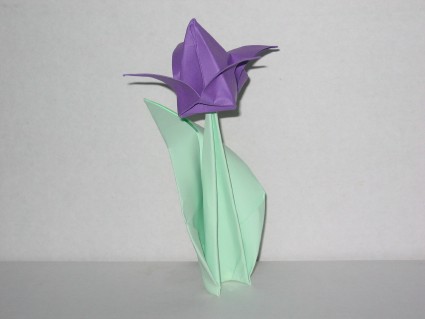

Stem and Leaf 2
Stem and Leaf 2
Welcome page
Back to the list

|

Stem and Leaf 2 |
|
Folding sheets Stem and Leaf 2 Welcome page Back to the list |
Aveuglami project - folding sheet
Stem and Leaf 2
| Author | Traditional |
| Category | flower |
| Difficulty | ** |
| Format | square |
| Base | diamond |
| Text |
This folding makes it possible to present a flower on a stem provided with a long leaf
starting from the base. This type can correspond to a flower like the tulip.
1. Take a square sheet, hold it in the diamond position. 2. Fold in a valley along the vertical diagonal, bringing the middle right corner to the middle left corner using a valley fold from right to left. Mark the fold. We obtain a triangular shape composed of two triangular flaps linked by a vertical hinge edge located on the right. 3. Create a valley fold by bringing the free top of the front triangular flap from left to right over the hinge edge by adjusting the upper left edge of the triangular flap along the hinge edge. 4. Flip the fold from right to left. The hinge edge is now on the left. 5. Create a valley fold by bringing the top edge of the front triangular flap from right to left over the hinge edge by adjusting the top right edge of the triangular flap along the hinge edge. We obtain a triangular shape with a long point upwards, the vertical hinge fold on the left. 6. Create a valley fold by bringing the bottom right edge of the front triangular shape from left to right over the hinge edge, folding through all thicknesses. 7. Flip the fold from right to left. The hinge edge is now on the left. 8. Create a valley fold by bringing the lower edge of the front flap from left to right on the hinge edge, adjusting the side all along this edge. We have a diamond base in the closed position, which gives an elongated triangular shape, with a hinge fold in the vertical position on the right. Prepare a thin stem 9. Create a valley fold by bringing the lower left edge of the front triangular flap from left to right over the hinge edge, folding through all thicknesses. 10. Flip the fold from right to left. The hinge edge is now on the left 11. Create a valley fold by bringing the lower right edge of the front triangular flap from right to left over the hinge edge, folding through all thicknesses. 12. Open the fold so that the small flaps are at the front. 13. Create a valley fold by bringing the bottom tip of the shape over the top tip from bottom to top. Carefully monitor the installation of the different thicknesses. Mark the fold well. 14. Fold in a valley from left to right, leaning on the middle fold, so as to close the fold. We obtain a shape with a sharp point upwards and a horizontal base. This tip will form the leaf. It hides another interior point, which will be the stem. 15. Fold the outer tip backwards with an outer reverse fold, so as to form a downward-facing leaf. Keep a rounded shape. There is no benchmark. It all depends on the shape you want to obtain. For example, we can start from the middle of the lower right edge of the outer tip. To make this step easier, open the fold slightly, sketch the reversal, then close the fold. The result is a fairly pointed stem surrounded at the base by the beginning of a fairly long leaf. Now just place a flower at the top of the stem. In the photo, the stem bears a [tulip]. |
| Contents | File |
| Stem and Leaf 2 - PDF file | ML-Flower16Ang.pdf |