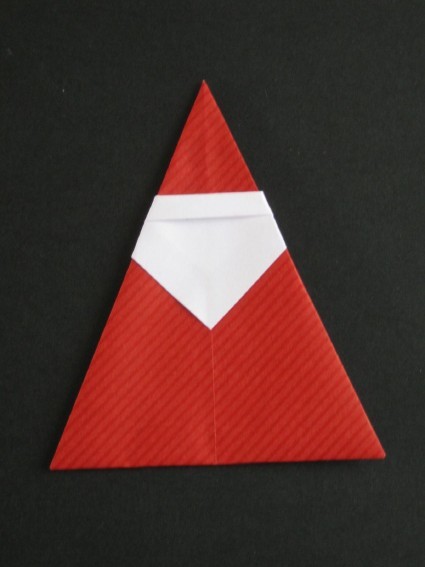

Santa Claus 1
Santa Claus 1
Welcome page
Back to the list

|

Santa Claus 1 |
|
Folding sheets Santa Claus 1 Welcome page Back to the list |
Aveuglami project - folding sheet
Santa Claus 1
| Author | Makoto Yamaguchi |
| Category | character |
| Difficulty | ** |
| Format | square |
| Base | multi-sheets |
| Text | Here is a fun folding, both simple and very expressive. It consists of two parts: the body and the face.
Santa's body 1. Take a square red sheet of paper. 2. Fold one base of the kite, hold it small triangular flaps on top, sharp point upwards. The bottom edges of the triangular flaps form a horizontal line. 3. Bring the lower point upwards, creating a valley fold aligning with the horizontal line formed by the lower edges of the two small triangular flaps. 4. Slide the raised tip under the two triangular flaps. The body is finished. Allow the two triangular flaps to open slightly, which allows the folding to stand upright. Head of Santa Claus 1. Take a sheet of white paper 1/4 size of the sheet used to create the body. 2. Fold the two diagonals, leave the fold open, in diamond position. 3. Bring, through a valley fold from top to bottom located a little above the horizontal diagonal, the upper point on the fold of the vertical diagonal. There is no reference. We construct the border of Santa's hat. We obtain a small triangle which covers part of a 5-sided shape, formed by a large lower triangle surmounted by a small trapezoid. 4. Bring the upper edge down, marking through all the thicknesses a valley fold resting on the horizontal diagonal. We now have a triangle bordered at the top by a thicker strip. This will be the face of Santa Claus. Assembly 1. Arrange the body vertically, small triangular flaps at the back, sharp point at the top. 2. Arrange the face on the body, aligning the vertical median folds of the two parts, point of the face downwards. There is no reference point. You should not go too low, to maintain a good proportion between the cup and the rest of the body. Two kinds of spikes protrude from each side of the body. 3. Fold the point that extends to the right backwards using a mountain pleat, resting on the right side of the body. Be careful to hold your face in place. 4. Fold the point that extends to the left backwards using a mountain pleat, resting on the left side of the body. 5. Flip the fold from right to left. 6. Fold the right point backwards using a mountain pleat under the triangular flap it covers. 7. Fold the left point backwards using a mountain fold under the triangular flap that it covers. 8. Flip the fold from right to left. And here is a pretty little Santa Claus. If we play with the position of the face (off-center, offset point, etc.), we obtain different expressions which allow us to easily create a troop of Santas! |
| Contents | File |
| Santa Claus 1 - PDF file | ML-Character01Ang.pdf |