
Elementary Box
Elementary Box
Welcome page
Back to the list

|

Elementary Box |
|
Folding sheets Elementary Box Welcome page Back to the list |
Aveuglami project - folding sheet
Elementary Box
| Author | Traditional |
| Category | box |
| Difficulty | * |
| Format | A4 |
| Base | box-pleating |
| Text |
Easy folding, nice result. What else?
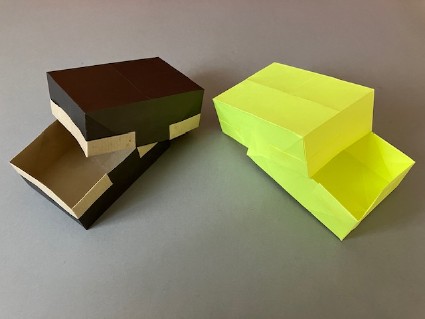
1. Place the rectangle in a vertical position, with the longest sides vertical. 2. Create a valley fold by bringing down the upper edge to the lower one. You get a new horizontal rectangle with two free flaps connected by a hinge fold. 3. Create a valley fold by bringing up the lower edge of the upper flap to the hinge edge. 4. Flip the folding from right to left. 5. Create a valley fold by bringing up the lower edge of the upper flap to the hinge edge. You have created a four folds accordion. 6. Open the folding by separating the two hinge folds and place it on the table in a horizontal position, the two free flaps on top. There is a slit separating the two free flaps. 7. Create a valley fold by bringing the right edge onto the left one. Mark well. When making this fold, check that the free flaps remain very flat. 8. Create a valley fold by bringing the left edge from left to right onto the right hinge edge. Mark well. 9. Flip the fold from right to left. 10. Create a valley fold by bringing the right edge from right to left onto the left hinge edge. Mark well. You have now a vertical accordion with four parts. On the left, you find two superimposed flaps with thick hinge edges. On the right, you find a double thickness lap, a thick hinge edge and, again a double thickness flap. 11. Create an oblique fold by bringing the upper right corner, as far as possible, onto the left thick hinge edge. Mark well. You create a rectangle triangle resting on the original flap. The fold starts at the top of the left thick hinge edge. The corner comes down to the thick hinge edge. 12. Create an oblique fold by bringing the lower right corner, as far as possible, onto the left thick hinge edge. Mark well. You create a rectangle triangle resting on the original flap. The fold starts at the bottom of the left thick hinge edge. The corner comes up to the thick hinge edge. 13. Flip the fold from right to left. 14. Create an oblique fold by bringing the upper left corner, as far as possible, onto the right thick hinge edge. Mark well. You create a rectangle triangle resting on the original flap. The fold starts at the top of the righ thick hinge edge. The corner comes down to the thick hinge edge. 15. Create an oblique fold by bringing the lower left corner, as far as possible, onto the right thick hinge edge. Mark well. You create a rectangle triangle resting on the original flap. The fold starts at the bottom of the righ thick hinge edge. The corner comes up to the thick hinge edge. 16. Unfold the accordion, put it in a horizontal position, smooth side onto the table. You get a symmetrical horizontal shape with 8 sides, supporting 4 triangles. In the middle, you have an horizontal slit, separating two simple flaps. The upper one is blocked by the sides of the upper triangles. The lower one is blocked by the sides of the lower triangles. 17. Create a valley fold by bringing up as far as possible the upper rectangular flap. Flatten down the flap. The new fold must run along the down sides of the upper triangles. Begin by putting the flap extremities at the vertical along the horizontal sides of the triangles. Finish by flatening the flap between these two small folds, then flatten the whole rectangular flap. 18. Create a valley fold by bringing down as far as possible the lower rectangular flap. Flatten down the flap. The new fold must run along the down sides of the upper triangles. Begin by putting the flap extremities at the vertical along the horizontal sides of the triangles. Finish by flatening the flap between these two small folds, then flatten the whole rectangular flap. The triangles are imprisoned by the rectangular flaps, which protrude from the basic shape. 17. Open the box by gently pulling the middles of the strips you just created. Folding becomes three-dimensional. Now you just need to clearly mark the folds that form the bottom and sides of the box. You need to lightly pinch the folds so that they take a good shape. Try with two-tone paper. The result is very nice! You can also make a smaller box by using a smaller piece of paper. Cut off 5 mm from one vertical side and one horizontal side from an A5 sheet of paper. Fold a rectangle box, which will be a little bit smaller than the one you just folded. The larger one will become a lid to put on the smaller one. Look at the photo! |
| Contents | File |
| Elementary Box - PDF file | ML-Box08Ang.pdf |