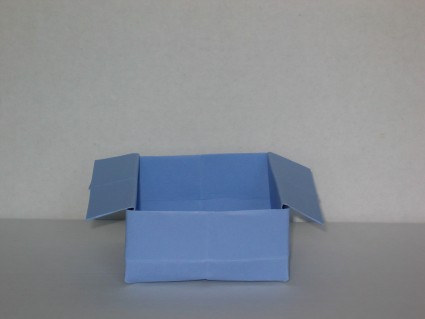

Square Box
Square Box
Welcome page
Back to the list

|

Square Box |
|
Folding sheets Square Box Welcome page Back to the list |
Aveuglami project - folding sheet
Square Box
| Author | Albertino Lionel |
| Category | box |
| Difficulty | ** |
| Format | square |
| Base | waterbomb |
| Text | Very simple but also very cute box model.
1. Start with a water bomb base. Unfold it completely, with the inside of the base facing downwards. Hold the sheet in a horizontal position. 2. Fold in a valley from right to left on the vertical median that already exists. 3. Create a valley fold by bringing the left edge of the top flap from left to right over the right hinge edge. 4. Create a valley fold by bringing the right edge of the top flap from right to left over the left hinge edge. 5. Flip the fold from right to left. 6. Create a valley fold by bringing the right edge of the top flap from right to left over the left hinge edge. 7. Create a valley fold by bringing the left edge of the top flap from left to right over the right hinge edge. 8. Open the fold by pivoting around the left hinge fold. We obtain a vertical rectangular shape, bordered on the left and right by an accordion of two flaps. 9. Flip the fold from right to left. 10. Locate, starting from the center of the rectangle, the diagonal folds extending from it. Fold then unfold the model in two with two valley folds resting successively on one then the other diagonal fold. You must fold through all thicknesses, and mark well. 11. Fold the model in half with a mountain fold resting on the horizontal median of the rectangle. Mark well, unfold. 12. Hold the fold between the thumb and index fingers of each hand, at the height of the ends of the horizontal median fold. Gently push backwards. A point forms towards the front, at the intersection of the diagonal and median folds that have just been prepared. Continue to push until the fold is closed. We have a 5-sided shape, composed at the bottom of a closed point connected on the left and right to a vertical side, the whole being formed by a horizontal upper side. There are actually two flaps, one forward, the other backward. These two flaps enclose two symmetrical triangular points which are connected by hinge folds to the lower point of the pentagon. 13. Locate the valley fold which is carried by the vertical median of the front flap. This fold starts at the bottom tip. 14. Create a valley fold by bringing the right edge of the front flap from right to left on the vertical median of the pentagon. 15. Create a valley fold by bringing the left edge of the front flap from left to right on the vertical median of the pentagon. The two edges touch. 16. Flip the fold from right to left. 17. Create a valley fold by bringing the right edge of the front flap from right to left on the vertical median of the pentagon. 18. Create a valley fold by bringing the left edge of the front flap from left to right on the vertical median of the pentagon. The two edges touch. We have a pentagonal shape, tip down, composed of two front and rear flaps which contain internal flaps linked to the lower tip. 19. Starting from the bottom of the lower point, mark on each side of it the points where the vertical sides begin. Fold the point in the valley from the bottom to the top, relying on the horizontal line joining the two points that you have just identified. 20. Unfold, fold into the mountain, return to the initial position. Repeat the operations several times. 21. Starting at the top left and right corners and working down along the vertical edges, locate the left and right intersections with the top edges of the hidden internal flaps that extend horizontally toward the vertical median. 22. Bring the upper edge of the front flap from top to bottom using a valley fold, relying on the line joining the two points just identified. A slight extra thickness in this area makes the work easier. 23. Flip the fold from right to left. 24. Bring the upper edge of the front flap from top to bottom using a valley fold, relying on the line joining the two points just identified. 25. Slide a finger delicately inside the fold to begin to open it a little. 26. Little by little open the fold to shape it. The bottom should rise little by little, forming on the prepared folds. Smooth the edges well. |
| Contents | File |
| Square Box - PDF file | ML-Box05Ang.pdf |