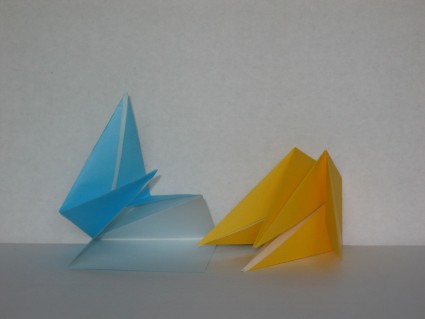

Bird Base
Bird Base
Welcome page
Back to the list

|

Bird Base |
|
Folding sheets Bird Base Welcome page Back to the list |
Aveuglami project - folding sheet
Base
| Author | Traditional |
| Category | Base |
| Difficulty | ** |
| Format | square |
| Base | Base |
| Text | This base allows you to create a multitude of models, ranging from birds to flowers, animals or various objects. 1. Take a square sheet. 2. Start with a preliminary base. Hold it with the closed tip upwards. 3. Raise the upper left flap slightly to the right to locate the central axis. 4. Form a valley fold by bringing the lower edge of the right flap along the central axis (oblique fold). Carefully watch the fold towards the open point at the bottom. 5. Form a valley fold by bringing the lower edge of the left flap along the central axis (joined to the previous fold). Carefully watch the fold towards the open point at the The front flap now has two triangles folded towards the median vertical axis. The upper edges of these two triangles draw a horizontal line towards the closed point. 6. Form a valley fold by bringing the closed upper point up and down on the front flap.The valley fold is based on the horizontal line formed by the upper edges of the two front triangular flaps. Mark the fold several times. Unfold. 7. Unfold the two triangular flaps created in the previous two steps. We returned to the front square flap. We will transform it into an elongated diamond using a petal fold. 8. Tilt the lower tip of the front flap upwards. Once vertical, the flap then tends to close. The lower left and right edges join the central axis, pivoting around the preparatory folds made in step 4 and step 5. Flatten these folds by going up from the tip towards the vertical flap. Place a finger on these folds to hold them. 9. Continue to push the tip backwards until it lies flat. The upper left and right edges of the initial flap must meet the central axis. To do this, you must use the folds that you prepared previously, but which are against the fold (mountain instead of valley). Bring the tip completely flat, smooth out the creases that have just formed. The result is the transformation of the square flap into a very elongated diamond, the lower point of which is blocked in the folding, while the upper point is free. 10. Return the fold. We must now apply the petal fold to the rear flap, applying the same sequence of operations. 11. Raise the upper left flap slightly to the right to locate the central axis. 12. Form a valley fold by bringing the lower edge of the right flap along the central axis (oblique fold). Carefully watch the fold towards the open point at the bottom. 13. Form a valley fold by bringing the lower edge of the left flap along the central axis (joined to the previous fold). Carefully watch the fold towards the open point at the bottom. The front flap now has two triangles folded towards the median vertical axis. The upper edges of these two triangles draw a horizontal line towards the closed point. This line has already been marked in a previous step. 14. Unfold the two triangular flaps created in the previous two steps. We returned to the front square flap. We will transform it into an elongated diamond using a petal fold. 15. Tilt the lower tip of the front flap upwards. Once vertical, the flap then tends to close. The lower left and right edges join the central axis, pivoting around the preparatory folds made in steps 10 and steps 11. Flatten these folds by going up from the tip towards the vertical flap. Place a finger on these folds to hold them. 16. Continue to push the tip backwards until it lies flat. The upper left and right edges of the initial flap must meet the central axis. To do this, you must use the folds that you prepared previously, but which are against the fold (mountain instead of valley). Bring the tip completely flat, smooth out the creases that have just formed. The base of the bird is ready. The result is an elongated diamond shape, including: o at the bottom, two very sharp points of quadruple thickness, corresponding to half of the point of the diamond, o at the top, two triangular flaps of double thickness, one in front, the other in the back, o between the two, a short point ensuring the connection between all the hinge edges of the other four points. |
| Contents | File |
| Bird Base - PDF file | ML-Base11Ang.pdf |