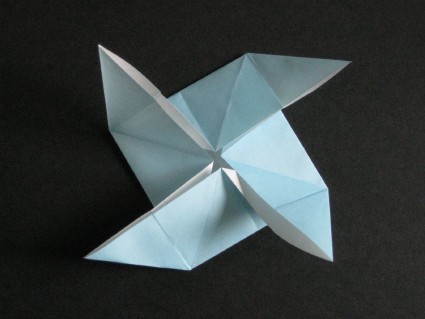

Windmill Base
Windmill Base
Welcome page
Back to the list

|

Windmill Base |
|
Folding sheets Windmill Base Welcome page Back to the list |
Aveuglami project - folding sheet
Windmill Base
| Author | Traditional |
| Category | Base |
| Difficulty | * |
| Format | square |
| Base | Windmill |
| Text | The base of the windmill, also called multiform base, allows you to create many decoration models. 1. Hold the sheet in a horizontal position, color side up. 2. Form a valley fold by bringing the upper edge to the lower edge from top to bottom. We obtain a rectangular shape made up of two flaps linked by an upper hinge edge. 3. Form a valley fold by bringing, from bottom to top, the lower edge of the front flap over the upper hinge edge. 4. Flip the fold from right to left. 5. Form a valley fold by bringing, from bottom to top, the lower edge of the front flap over the upper hinge edge. We have a horizontal accordion with 4 folds, linked by two lower hinge folds and an upper hinge fold located inside the form. 6. Open the accordion by laying the two double flaps flat using the upper hinge fold. We obtain a horizontal rectangular shape, carrying two upper flaps. 7. Flip the fold from right to left. Both flaps are now below. 8. Form a valley fold by bringing, from right to left, the right edge to the left edge. We fold through all thicknesses. We now have two flaps of double thickness linked to straight by a vertical hinge fold. 9. Form a valley fold by bringing, from left to right, the left edge to the right edge. 10. Flip the fold from right to left. 11. Form a valley fold by bringing, from right to left, the right edge to the left edge. We have a vertical accordion made up of 4 flaps of double thickness. 12. Open the accordion by bringing the rear hinge fold forward, from right to left. We have a square shape with, at the front, two rectangular flaps of double thickness, in a vertical position. 13. Flip the fold from right to left. 14. Form a valley fold by bringing the top edge over the bottom edge. The result is a horizontal rectangular shape that has two square flaps. These flaps each have only one free point, located at the bottom, in the middle of the lower edge. 15. Form an oblique valley fold by bringing the lower right point of the left square to the upper left vertex. Unfold. 16. Form an oblique valley fold by bringing the lower left point of the right square to the upper right vertex. Unfold. 17. Flip the fold from right to left. 18. Form an oblique valley fold by bringing the lower right point of the left square to the upper left vertex. Unfold. 19. Form an oblique valley fold by bringing the lower left point of the right square to the upper right vertex. Unfold. 20. Open the fold to return to a square shape with two double-thick flaps on top. 21. Unfold the upper left flap to the left. The left part tends to open by folding over the two oblique valley folds located on the right. 22. Open the left part completely by bringing the flaps delimited by the two oblique valley folds vertically. The left part also comes vertical. Two points form, at the top and at the bottom. 23. Pushing from left to right, completely flatten the left flap. The original vertical rectangle has been transformed into a trapezoid forming two points that protrude from the base square. 24. Unfold the upper right flap to the right. The right part tends to open by folding over the two oblique valley folds located on the left. 25. Open the right part completely by bringing the flaps delimited by the two oblique valley folds vertically. The right part also comes vertical. Two points form, at the top and at the bottom. 26. Pushing from right to left, completely flatten the right flap. |
| Contents | File |
| Windmill Base - PDF file | ML-Base08Ang.pdf |