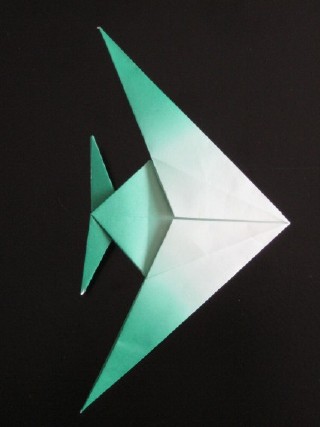

Angelfish
Angefish
Welcome page
Back to the list

|

Angelfish |
|
Folding sheets Angefish Welcome page Back to the list |
Aveuglami project - folding sheet
Angefish
| Author | Montroll John |
| Category | animal |
| Difficulty | ** |
| Format | square |
| Base | bird |
| Text | This fish has an original shape. It requires a little help to make, but is very easy nonetheless. 1. Start by making the base of the bird, which is held with the tip closed at the top. We obtain a kite shape with the sharp point facing downwards. 2. Bring, using a valley fold from bottom to top, the lower point of the upper flap on the closed point. We obtain a triangular flap which has a horizontal base located towards the middle of the shape. 3. Bring, by a valley fold from right to left starting from the lower right vertex of the triangular flap, the upper point of the same flap on the middle left vertex of the kite. Unfold. 4. Bring, by a valley fold from left to right starting from the lower left vertex of the triangular flap, the upper point of the same flap on the middle right vertex of the kite. Unfold. 5. Using the preparation folds that we have just made and pinching the tip of the triangular flap, make a rabbit ear facing to the left. The triangular flap turns into a horizontal sharp point, extending from a lower triangular area. 6. Turn the lower part carrying the rabbit ear from top to bottom so as to bring it against the hidden lower flaps. The initial upper flap of the bird's base is transformed into a 6-sided shape ending at the bottom left with a sharp point. This will be a caudal fin. 7. Flip the fold from left to right. 8. Repeat steps 2 to steps 7 by applying them to the upper flap of the base of the bird. We obtain a shape which has a large point closed upwards, at the front and at the back a six-sided flap ending with a point oriented to the left or right. Between the two outer flaps are two long points which each form an upper vertical flap and a lower vertical flap. If the model is held vertically, a vertical valley fold starting from the closed tip divides it into two symmetrical parts. 9. Bring, using an oblique valley fold from left to right, the upper left side of the left vertical flap onto the middle valley fold. You can help yourself to make this fold by holding the upper right vertical flap vertically. 10. Bring, using an oblique valley fold from right to left, the upper right side of the right vertical flap onto the middle valley fold. The edge that is folded is placed along the edge folded in the previous step. 11. Flip the fold from left to right. 12. Bring, by an oblique valley fold from left to right, the upper left side of the left vertical flap on the middle valley fold. You can help yourself to make this fold by holding the upper right vertical flap vertically. 13. Bring, by an oblique valley fold from right to left, the upper right side of the right vertical flap on the middle valley fold. The edge that is folded is placed along the edge folded in the previous step. 14. Perform a reverse fold on the left inner point, making an arc from bottom to top at the point and lightly holding the top of the closed point in place. The front and rear left sides of the closed point will swing around the preparation folds that have just been made to cover the closed point on both sides. By delicately pinching it starting at the tip itself, you must ensure that the long valley fold which runs all along the tip completely transforms into a mountain fold. A few more creases form inside, but we don't take care of them. 15. Perform a reverse fold on the right inner point, making an arc from bottom to top at the point and lightly holding the top of the closed point in place. Mark all the folds well. |
| Contents | File |
| Angelfish - PDF file | ML-Animal10Ang.pdf |